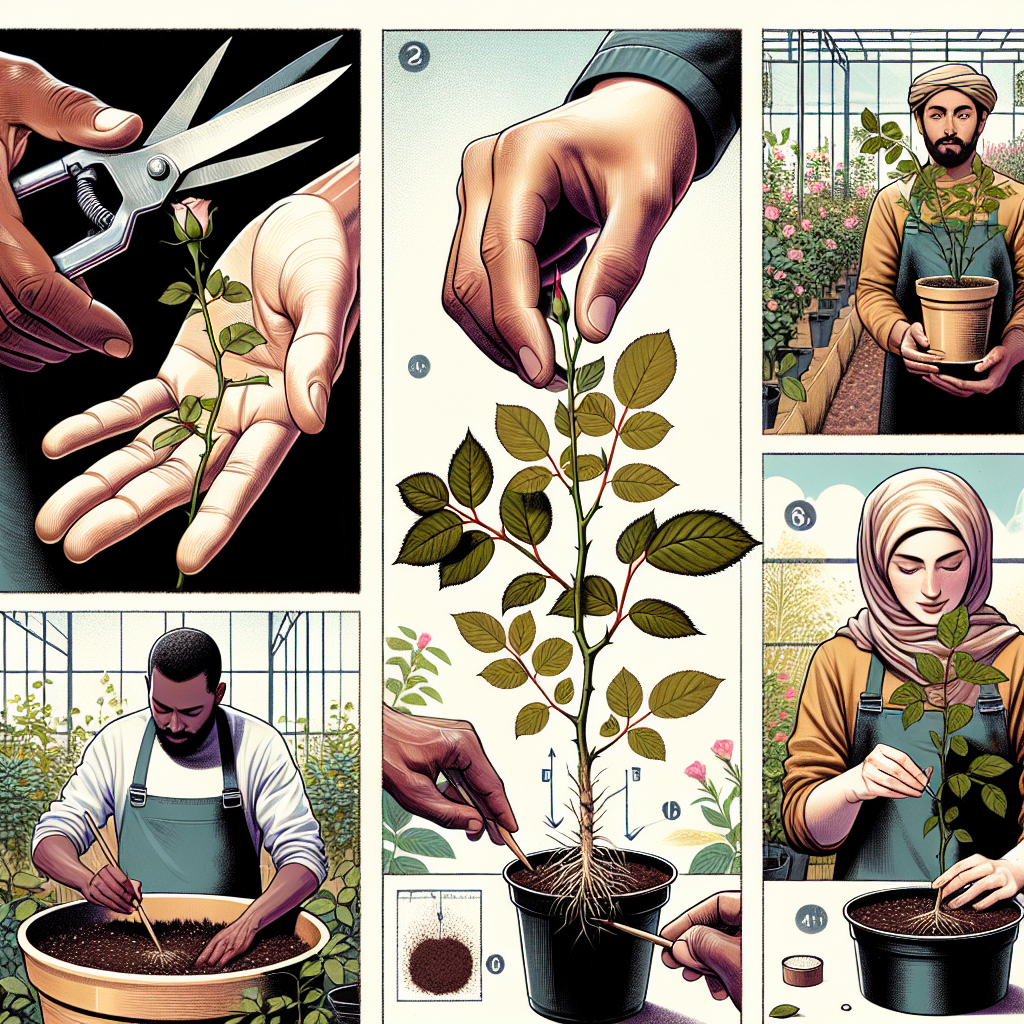
How to grow roses from cuttings
How to Grow Roses from Cuttings: A Comprehensive Guide
Growing roses from cuttings is a rewarding process that allows you to propagate your favorite rose varieties. It can be an engaging project for all gardening enthusiasts, providing not only a sense of achievement but also a chance to expand your garden beautifully. In this article, we will explore the step-by-step process of propagating roses, potential challenges, and tips to ensure successful growth.
Understanding Rose Cuttings
Before diving into the practical steps, it’s essential to understand what rose cuttings are. Rose cuttings are sections of a rose stem that are cut and planted to produce new plants. This method is advantageous because it preserves the characteristics of the parent plant, allowing you to cultivate roses that are true to their original form.
Types of Rose Cuttings
There are primarily three types of cuttings used for propagating roses:
- Stem cuttings: These are sections of a stem taken from a healthy rose bush, usually taken from a non-flowering stem.
- Leaf-bud cuttings: These include a leaf and a bud, offering a slightly different propagation method.
- Root cuttings: Although less common, this method involves cutting pieces from mature roots to grow a new plant.
The most popular and successful method among gardeners is the stem cutting, especially for beginners.
When to Take Cuttings
The best time to take rose cuttings is during the growing season, typically late spring to early summer. Aim for a period when the plants are actively growing, as this increases the chances of successful rooting.
Tools and Materials Needed
Before you begin, make sure you have the following tools and materials:
- Sharp garden pruners or scissors
- Clean containers or pots
- Fresh potting soil
- Rooting hormone (optional, but helpful)
- Plastic bags or a humidity dome
- Watering can or spray bottle
Step-by-Step Guide: How to Grow Roses from Cuttings
Now that we’ve gathered our materials, let’s explore the process of propagating roses from cuttings step by step:
Step 1: Choosing the Right Cutting
Select a healthy rose bush with vigorous, non-flowering stems. Look for stems that are about 6 to 8 inches long and have at least two to three sets of leaves. Make sure the stem is mature and firm to the touch.
Step 2: Taking the Cutting
- Using sharp pruners, cut a stem off just below a node (the area where leaves are attached). Ensure the cut is at a 45-degree angle.
- Remove the lower leaves, leaving a few fresh leaves at the top. This action prevents water loss.
- If desired, dip the cut end in rooting hormone to enhance root growth.
Step 3: Preparing the Potting Mix
Fill your container with a well-draining potting mix. You can use a mixture of garden soil, sand, and perlite. Ensure that the mix is moistened but not soggy before planting the cuttings.
Step 4: Planting the Cutting
Create a hole in the soil using a pencil or your finger and gently insert the cutting, burying the cut end about 2-3 inches deep. Firm the soil around the base to eliminate air pockets and provide stability.
Step 5: Creating a Humid Environment
To encourage rooting, cover the pot with a plastic bag or a humidity dome. This helps maintain moisture levels and creates a greenhouse effect, which is conducive for rooting.
Step 6: Watering
Water the cuttings lightly but do not let them sit in water. Check daily and ensure that the soil remains moist, but avoid overwatering, as this can lead to rot.
Step 7: Monitoring Growth
Place your pot in a warm location with indirect sunlight. After a few weeks, you should notice new growth, which signals that rooting has occurred. Remove the covering periodically to prevent mold and allow for air circulation.
Transplanting Your Cuttings
Once your cuttings have developed roots, typically after 4-6 weeks depending on conditions, it’s time to transplant them into larger pots or directly into your garden. Follow these steps:
- Select a location that receives at least 6 hours of sunlight daily.
- Carefully remove the young plants from their pots, handling them by the soil rather than the delicate stems.
- Prepare the new planting hole by loosening the soil and mixing in compost for added nutrients.
- Plant the rose, ensuring that the soil line matches where it was in the previous pot.
- Water thoroughly after planting to help settle the soil around the roots.
Common Challenges and Solutions
As with any gardening endeavor, you may encounter specific challenges when propagating roses from cuttings. Here are some common issues and practical solutions:
- Cuttings not rooting: Ensure you are using healthy cuttings and provide adequate humidity.
- Fungal growth: Excess moisture can lead to mold. Make sure to avoid overwatering and allow for air circulation.
- Pests: Check for aphids or spider mites. If any pests are present, consider using insecticidal soap.
Care and Maintenance of Newly Planted Roses
Once transplanted, your new roses will require ongoing care. Here are some essential maintenance tips:
- Watering: Water regularly, allowing the soil to dry slightly between watering sessions.
- Fertilization: Use a balanced fertilizer during the growing season to promote healthy growth.
- Pruning: Prune dead or diseased branches to maintain plant health and encourage bushier growth.
Conclusion
Learning how to grow roses from cuttings can seem daunting at first, but with patience and proper care, you can enjoy an abundance of beautiful roses in your garden. From selecting the right cutting to nurturing your new plants, each step is an opportunity to connect with nature and enjoy the fruits of your labor. By following this guide, you’ll be well on your way to creating a stunning rose garden that blooms year after year. Happy gardening!
By Guest, Published on August 15th, 2024